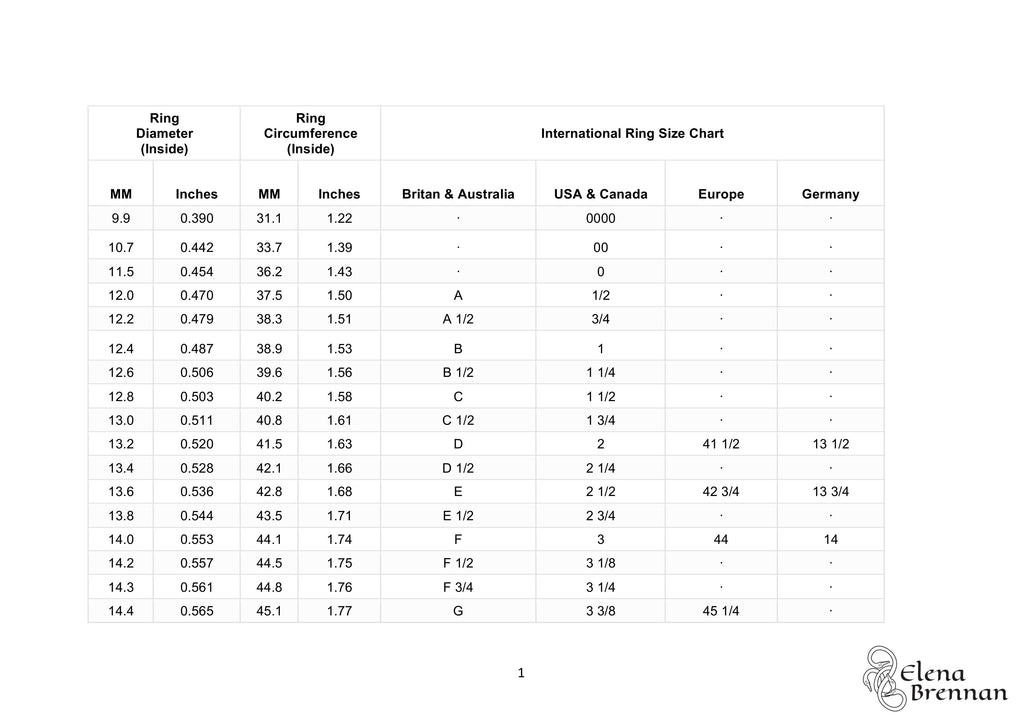
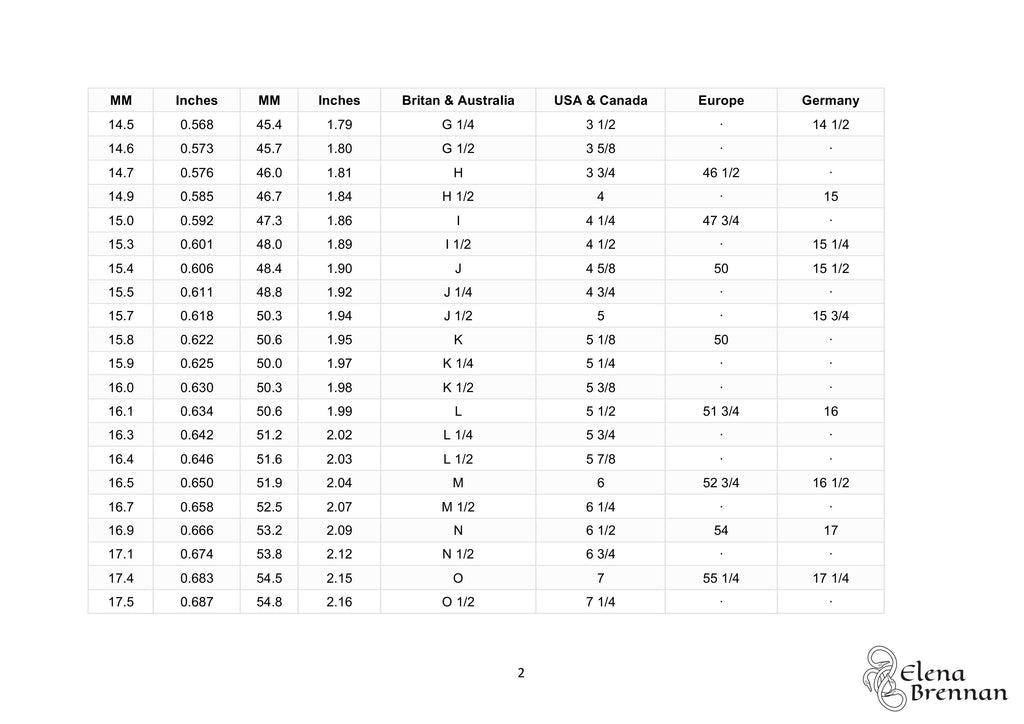
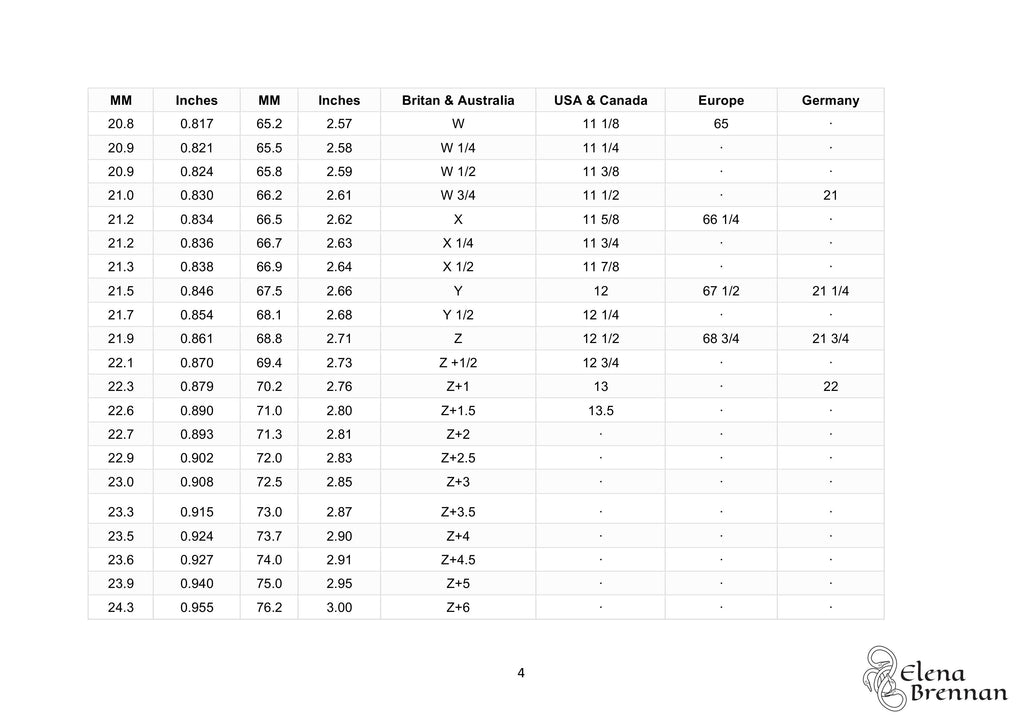
International Ring Size Conversion Chart

Last Autumn, I got a request from R to create a pendant for her daughter-in-law E for Christmas. R had a Tahitian black pearl that she wanted to set in a pendant.

The Tahitian Black Pearl
10mm in size, this stunning pearl was at the heart of the bespoke piece.
When I got chatting to R, I quickly realised that this had to be a very special design as it would be in memory of her son M, who had passed away suddenly just a few short months earlier. M had bought this pearl for his darling wife E and had planned to have a bespoke piece made. R wanted to surprise E and fulfil his wish.
M was an Irish musician who adored his beautiful wife and their young son. E wears mainly small jewellery, so designing something both meaningful and delicately proportioned was key.

Initial sketches
Exploring form, balance, and symbolism for a sensitive and meaningful design.
After many sketches, R and I settled on a bass clef shape. The two dots would hold birthstones (for M and their son), and the pearl would sit in the centre. Down the body of the bass clef would be M’s name, engraved in ancient Ogham script.

Final design sketch
The bass clef, birthstones, Ogham and pearl—every detail carefully considered.
I cut the bass clef from silver sheet and chased it to create a more three-dimensional shape.

Hand-crafted base
Cut and formed from sterling silver sheet for added depth and presence.
On top of the two dots, I soldered 18ct gold tube settings for the gemstones. I also created a secure setting for the pearl, complete with a centre spike.

Gold details
18ct gold tube settings prepared for the birthstones.
Drilling the pearl was a nerve-wracking step. After engraving M’s name in Ogham using hand tools, I soldered on the jump ring, set the gems, and gave everything a final polish. A light patina was added to darken the Ogham and enhance visibility.

Engraved in Ogham
M’s name carved by hand into silver, an eternal tribute.
Next came the final and delicate step: gluing in the pearl, making sure it was secure, flush, and scratch-free. Thankfully, it went smoothly!

Final assembly
Each element in place, ready to be treasured.

Patina finish
Highlighting the Ogham script while keeping the silver soft and elegant.
R and her husband collected the piece on Christmas Eve—and yes, there were tears. Mine too. M’s short life was honoured in a piece that will live on in love.

The finished pendant
A musical spiral of love and remembrance.
Elena, you have created the most beautiful and precious piece of jewellery with the black pearl my husband had brought many years ago from the Cook Islands.
Thank you so so much...
It is absolutely beautiful and so perfect! It'll be treasured forever and it'll be a family heirloom some day.
Thank you for putting so much thought and work into it. From the shape, the birthstones, M's name in Ogham — it is so precious.
You're incredibly talented.
Many of my friends have asked me about it already and keep on asking.
I love telling them about it and what it means... the story behind it.
Thank you so much for creating such a beautiful and meaningful frame for my precious M's pearl.
— E
Ready to create your bespoke piece?
Get in touch with me today through my website or visit my Facebook page. I look forward to bringing your vision to life!
